
Documentation
AI Product Preview
Version 1.0.0 · updated November 18, 2026
Overview
AI Product Preview shows furniture, lamps, decor and more where they’ll actually end up: in the customer’s home. On the product page, the “Preview in your home” button 1 appears below the gallery. In the window, the customer uploads a room photo, clicks or taps the spot they want – or drags the product there – and the AI places the product in the photo with matching perspective, light and shadows.
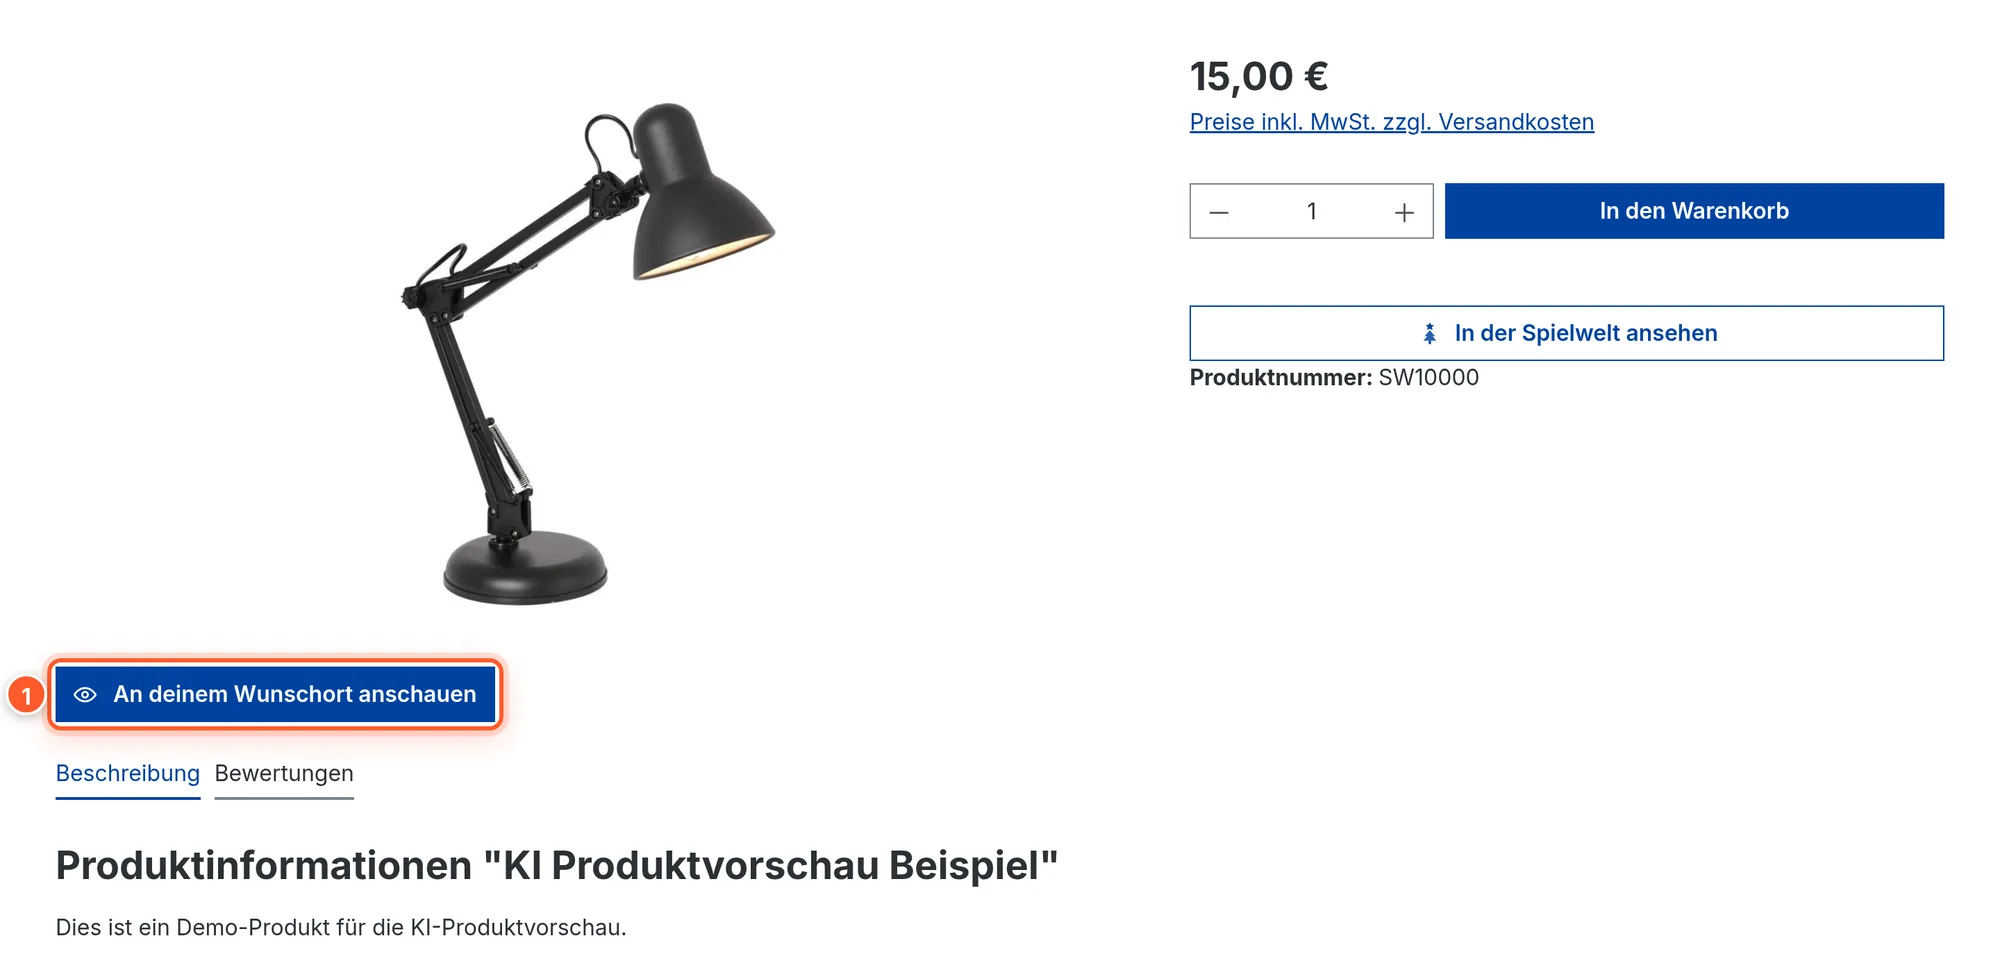
The extension is a Shopware app. Image generation is handled by the flink service at apps.flinkfactory.com; your shop connects to it automatically when you activate the app. You don’t need your own AI keys or servers. The interface is available in German and English; on touch devices, placing works with your finger.
Try it live: Demo shop – AI Product Preview example (log in with the demo customer account shown in the demo shop).
Setup
- Book, install and activate the app (Extensions › My extensions). On activation, the shop registers with the flink service.
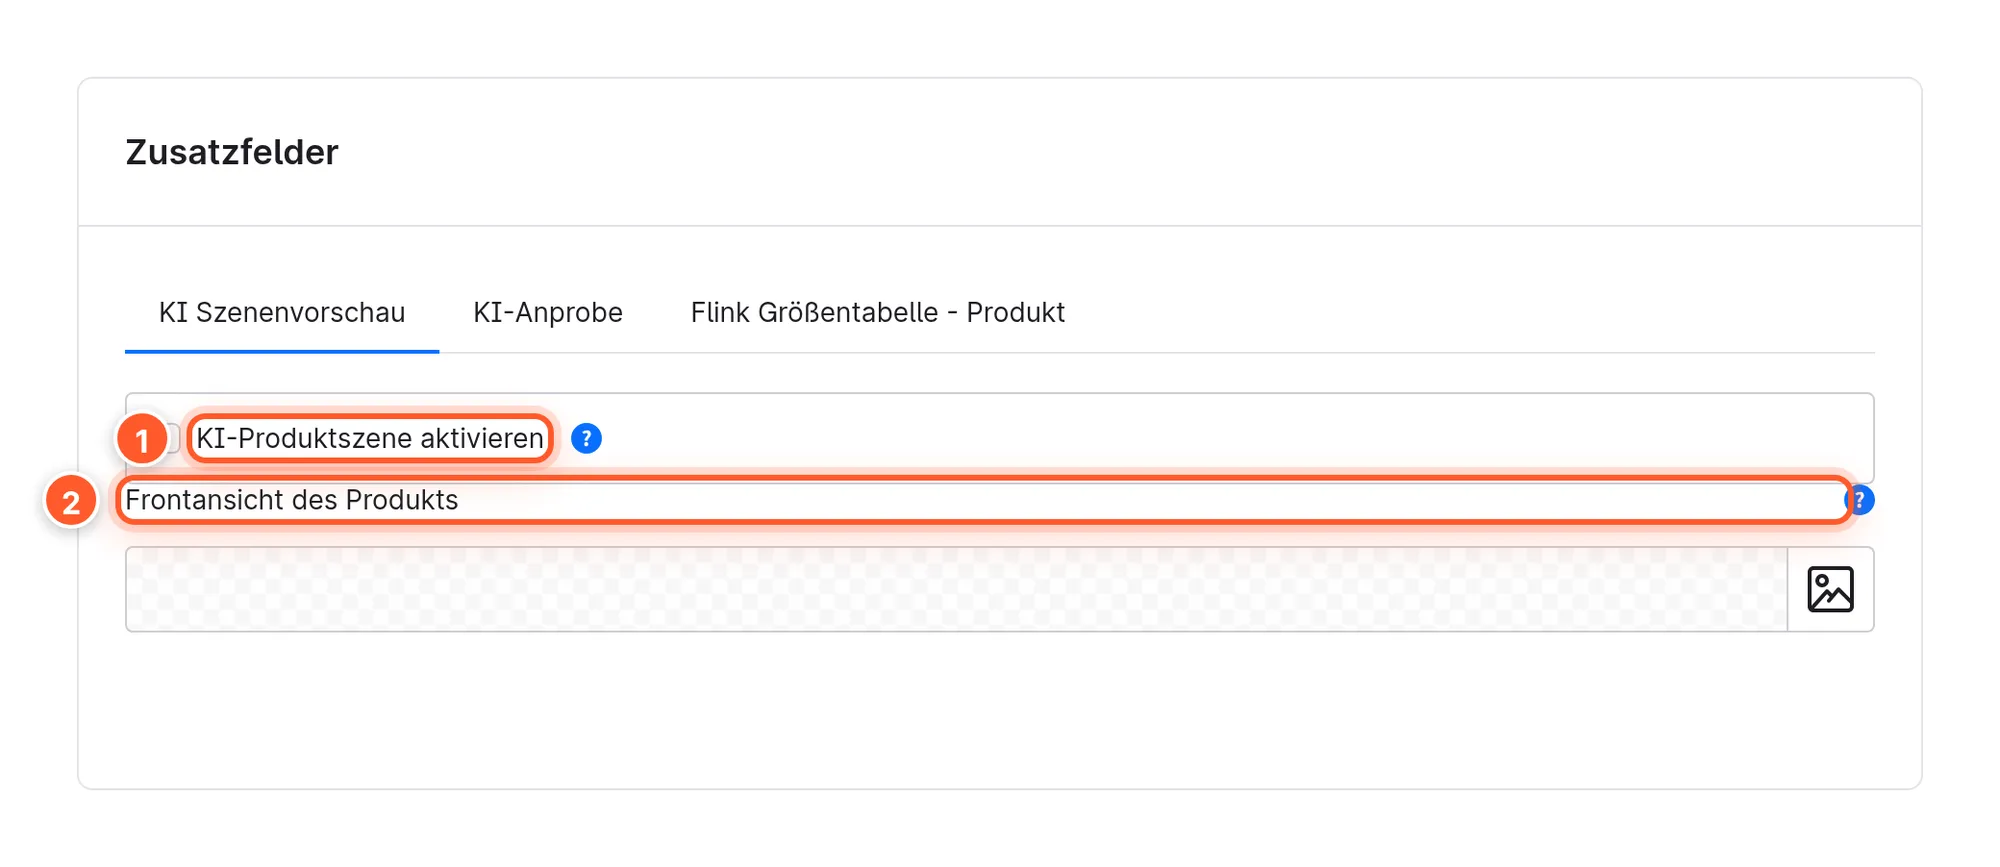
- Enable products: In the product under Specifications › Custom fields, in the AI Scene Preview set, switch on Enable AI product scene generation. There’s no global switch for all products in this app – on purpose, because not every product makes sense placed in a room.
- Add a front view (recommended): In the Front view of product field, add a cut-out image of the product from the front, ideally on a white background. Without its own image, the app uses the product’s cover image.
- Update your privacy policy (see Privacy).
- Test it in the storefront: open the product page, accept the Comfort features, log in, upload a room photo, click on a free spot.
The button is shown in the “Gallery & buy box” block – the default product page layout in Shopware 6.7. If your product page uses a custom layout without this block, the button won’t appear.
How the preview works
1. Log in
As with the AI Virtual Fitting Room, the feature is reserved for logged-in customers. Visitors who aren’t logged in see the login form and the Create an account button in the window; after logging in or registering, they return to the product page and the window opens again automatically.
2. Upload a room photo
The product 1 is on the left, on the right is the Scene area with Upload your room photo 2 and the Select Image button 3.
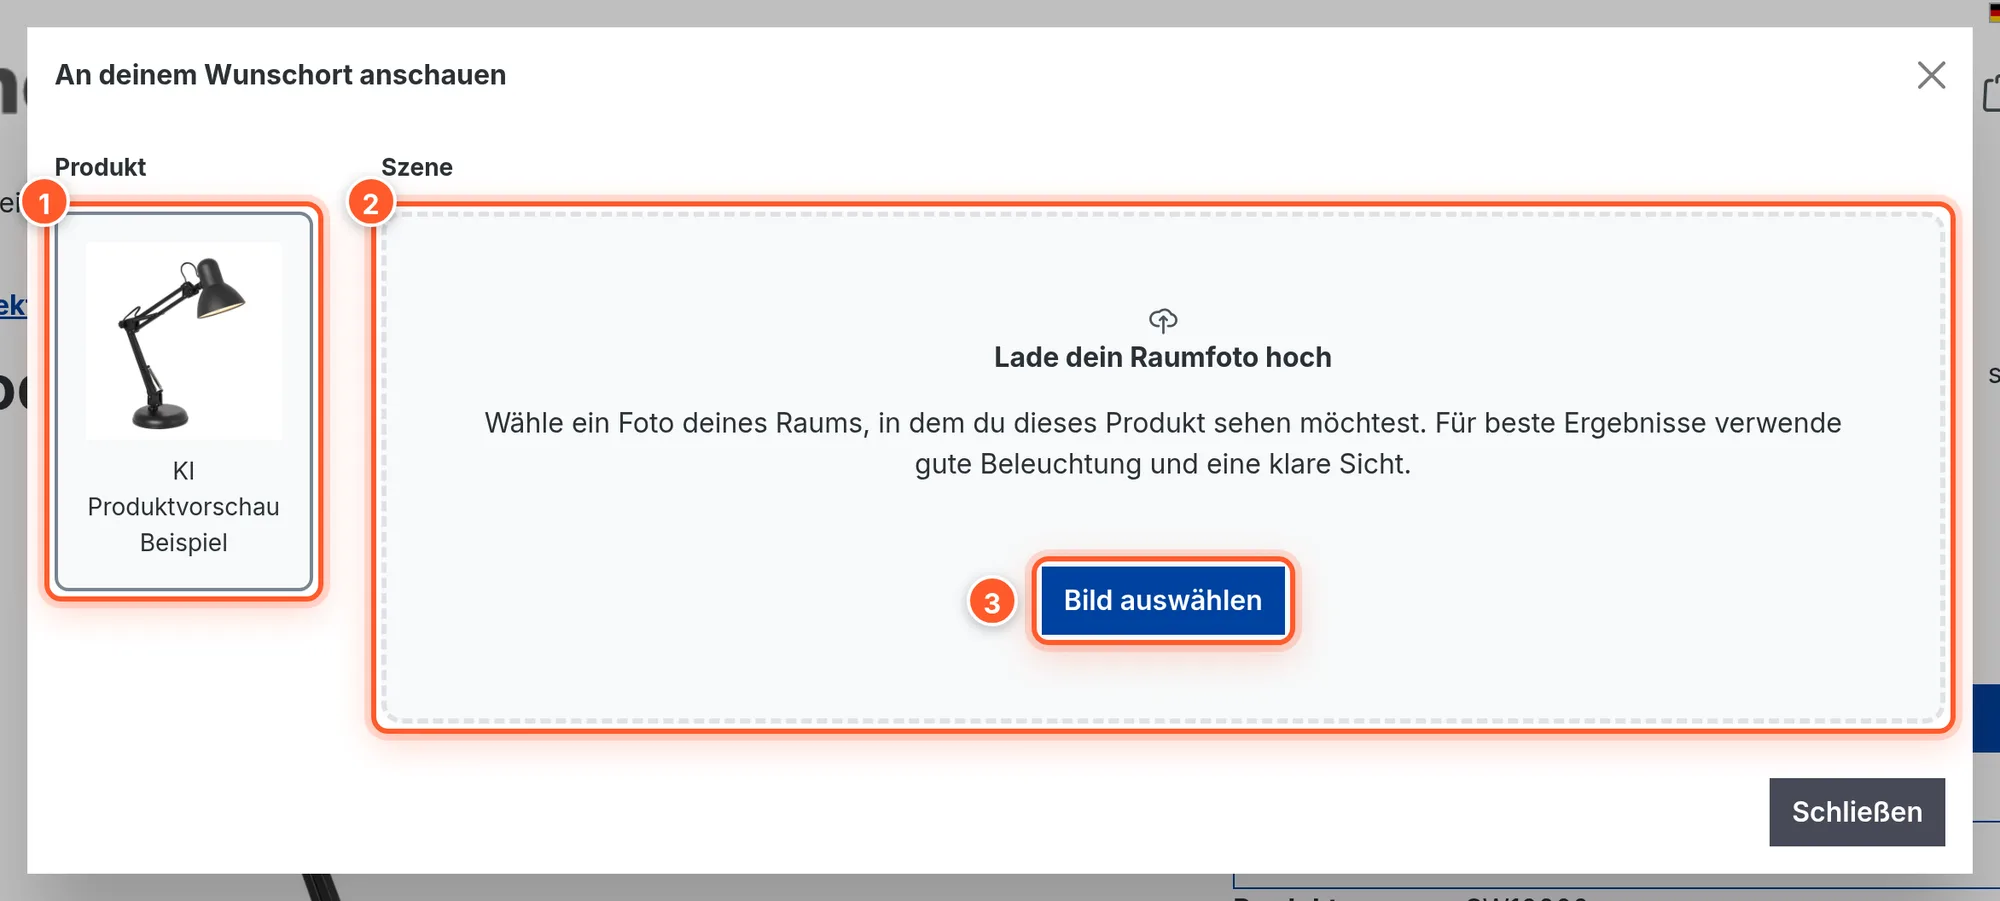
Well-lit photos with free space where the product should go work best (an empty wall, an empty corner, free floor space).
3. Place the product
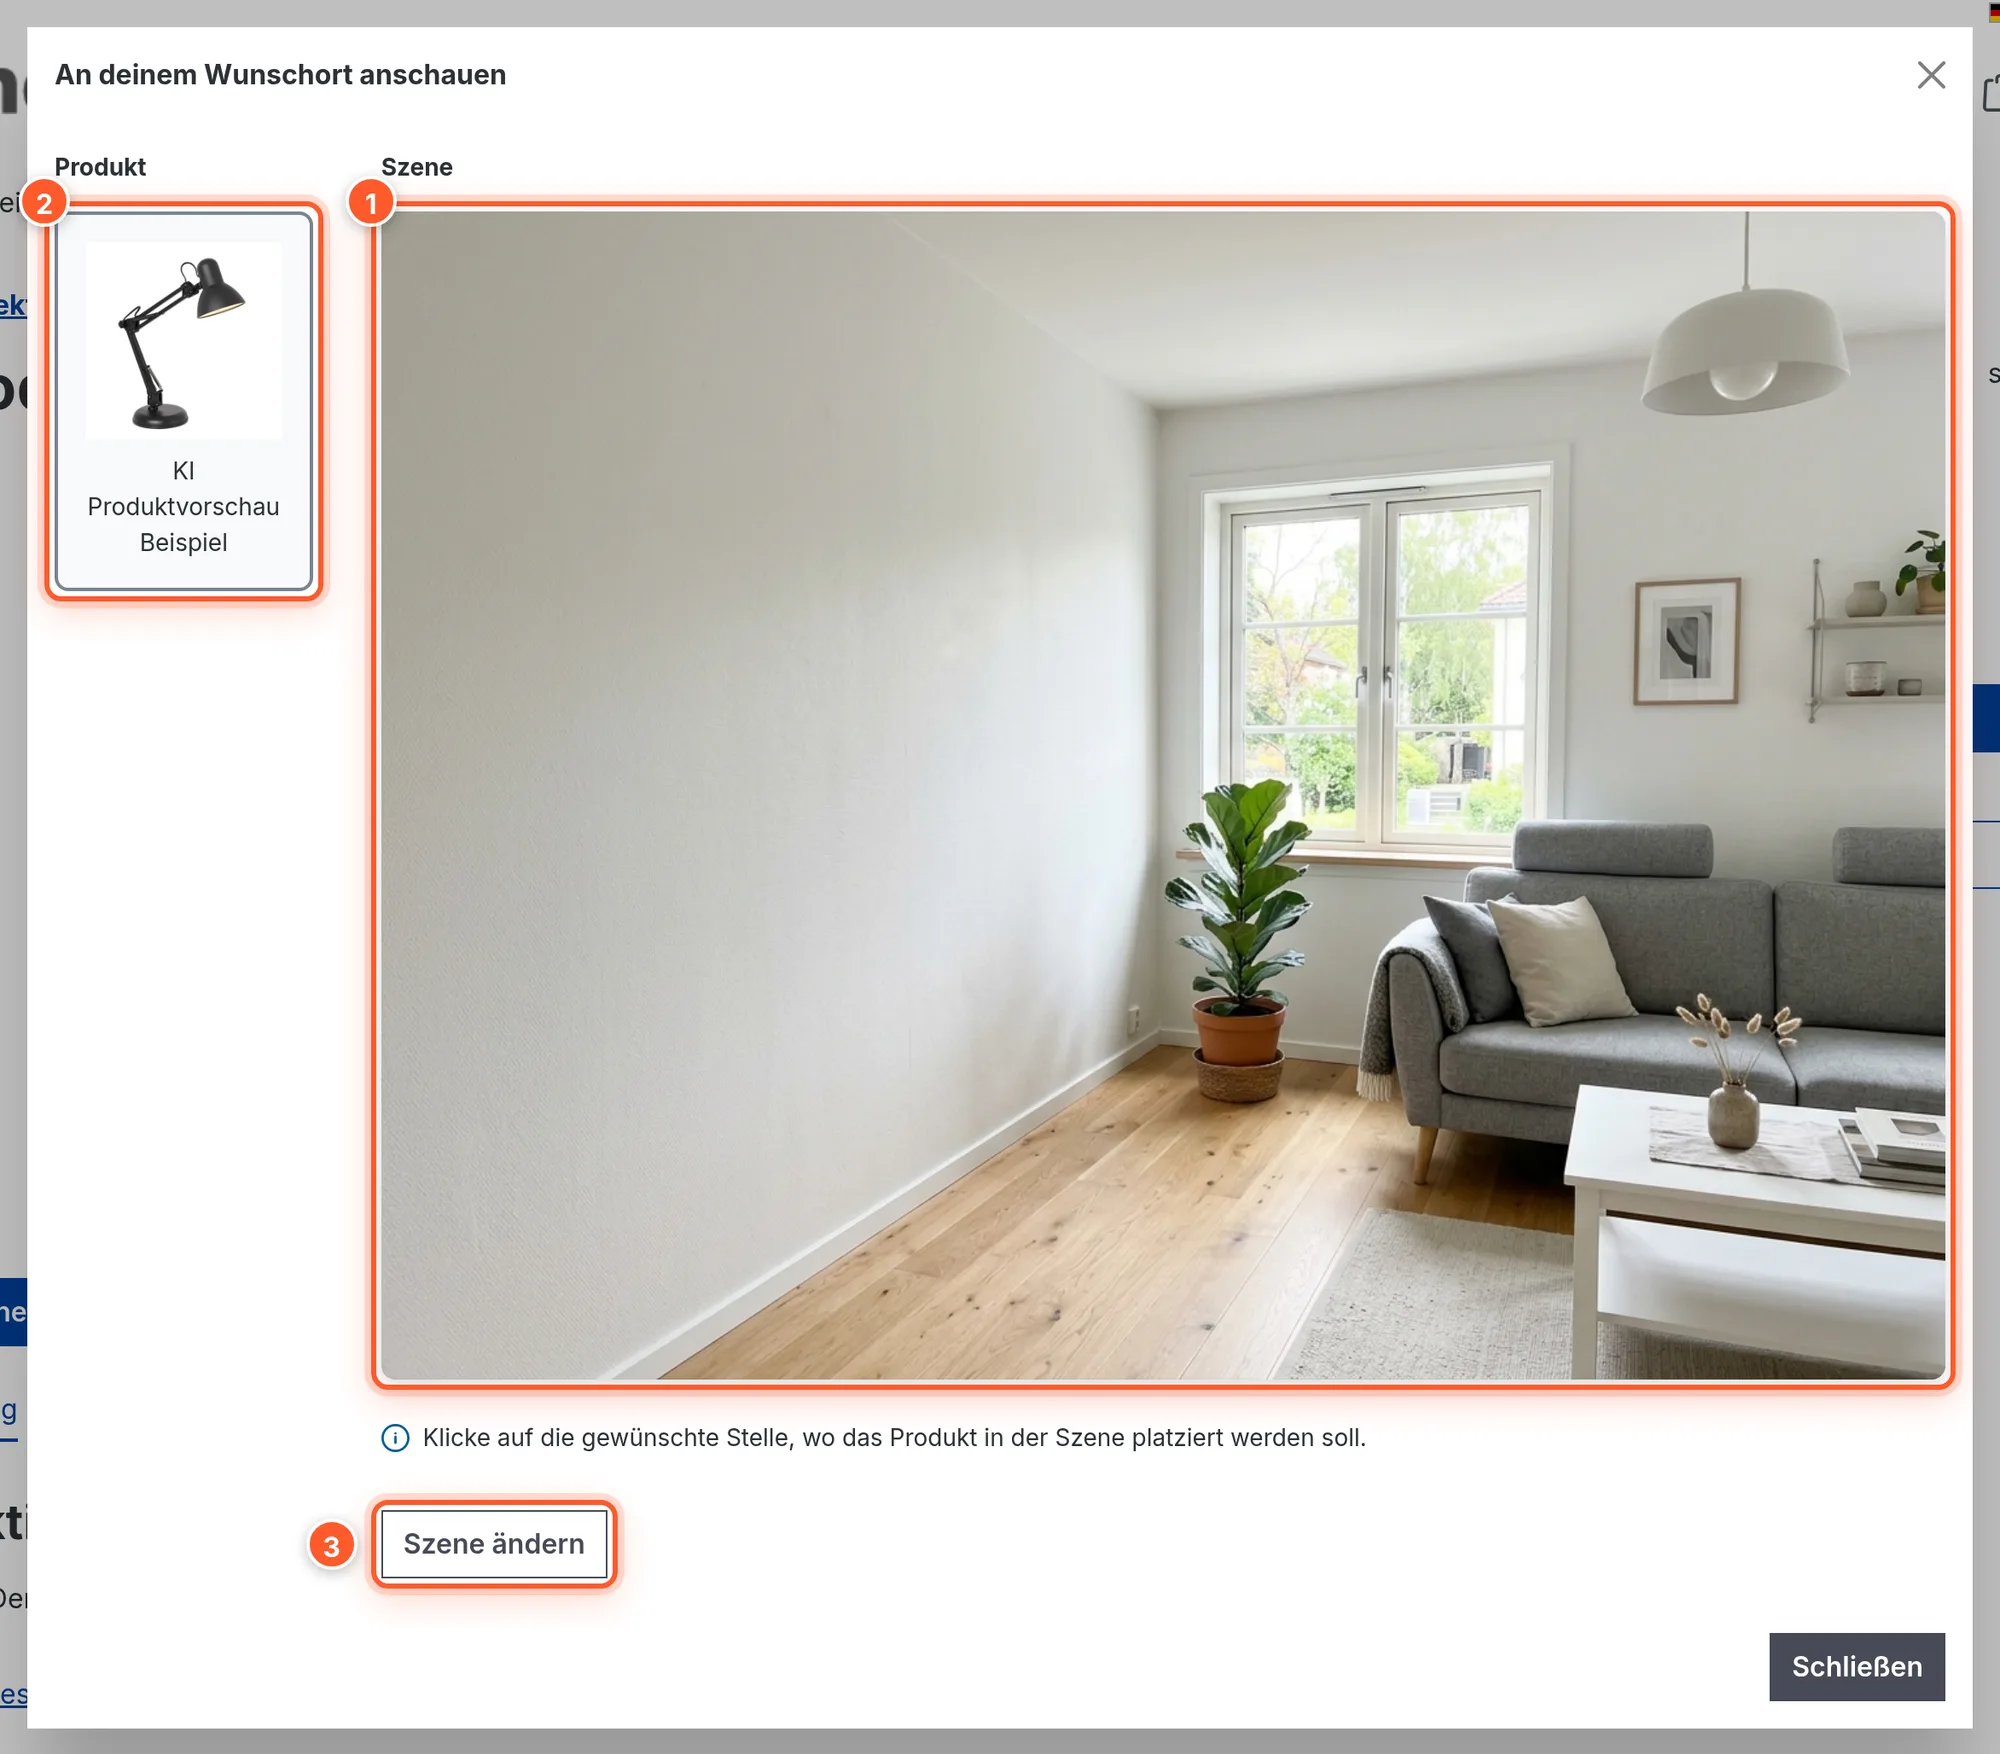
After the upload, the window shows the room photo 1. There are now three ways to set the position:
- click the spot you want in the photo,
- drag and drop the product image 2 onto the spot,
- on a smartphone, drag the product into the photo with your finger – a preview image follows your finger and a dot marks the target spot.
With Change Scene 3 the customer picks a different room photo.
4. Result
During generation, a dot marks the chosen spot and the window shows changing status messages (“Analyzing your product…”, “Surveying the scene…”, “Generating photorealistic options…”). The result then replaces the room photo right in the window.
Another click on a different spot creates a new variant – the AI again uses the original room photo, not the edited one. Each placement counts as one generation.
Settings
Extensions › My extensions › AI Product Preview › ⋯ › Configure. All values can be set per sales channel.
General Settings
| Setting | Effect | Default |
|---|---|---|
| Max generations per session | How many placements a customer may create – your most important lever for AI costs. Counted by the flink service. (1–50) | 5 |
| Image processing dimension (px) | Target size for width and height when the service processes images. (512–2048) | 1024 |
Advanced Settings
| Setting | Effect | Default |
|---|---|---|
| Debug mode | After a generation, shows the Show Debug Info button in the window: the room photo with the placement spot marked and the generation prompt used. For troubleshooting only – switch it off in production, because customers see this information too. | off |
| Max upload size (MB) | Maximum file size of room photos. (1–50) | 10 |
Privacy – what goes to the service
- Consent: The app registers the entry “AI Product Preview” in the Comfort features cookie group (cookie
flink-ai-scene-preview, 365 days) with the note “Uses Google’s Gemini API to create product previews using your photos.” Without consent, nothing can be generated. - What is sent for each placement (directly from the customer’s browser to
apps.flinkfactory.com):- the room photo in its original size,
- the product image (front view or cover image),
- product ID and product name,
- the chosen position (as a percentage of width and height).
- Authentication: via Shopware’s app token for logged-in customers; the token signed by your shop identifies the shop, sales channel and customer account, among other things.
- AI provider: according to the app’s cookie description, Google’s Gemini API.
- Result: The image is returned to the browser and shown in the window; the app doesn’t store it in your shop.
Room photos can show personal details (people, photos, documents, addresses at the window). Whether and for how long the flink service stores images isn’t part of the app code – clarify this with flink before going live (data processing agreement), mention the processing by flink and Google in your privacy policy, and ask customers to only upload photos without people.
Costs & limits
- The app is billed as a subscription in the Shopware Store (see the store page); every generation causes AI costs at the service.
- Max generations per session limits the placements per customer. The counter runs on the server; with fewer than 5 generations left, the window shows a note (“Only X generations left today. The limit resets at midnight.”), after that “No more generations left today”.
Tips & hidden features
- The front view makes the difference: A cut-out image without decor, shadows or a room behind it gives the AI a clean object. The product’s cover image in the shop can still be a mood shot.
- Click instead of drag and drop: On desktop, a simple click in the room photo is enough – faster for many customers than dragging.
- Compare variants: Several clicks on different spots (e.g. armchair to the left of the window, then to the right) show alternatives – each one uses up a generation.
- Direct link: The product page opens the window automatically when the URL contains
?openScenePreview=1– useful for newsletter or social media links (the customer has to be logged in). - Troubleshoot with debug mode: If the AI places the product oddly, debug mode shows you where the click landed and which prompt the service used. Switch it off again afterwards.
Frequently asked questions
The button doesn’t appear.
Check that Enable AI product scene generation is switched on in the product, that the product page uses the “Gallery & buy box” block and that the product has an image. Then clear the cache.
“Please accept the AI product preview cookie …”
The customer hasn’t accepted the comfort features. Via Cookie settings (footer) they can allow “AI Product Preview” later.
“We had problems placing the product in your scene.”
The AI couldn’t find a suitable place at the chosen spot. Pick a freer spot or use a photo with more free space; for small products, take the photo from closer up.
Does this also work for large products like sofas?
Yes – what matters is that the room photo has enough free space in a matching perspective and that the front view shows the whole product.
Error 500 on the product page in Shopware 6.7
The preview window template in version 1.0.0 accesses a context property that no longer exists in Shopware 6.7. If an error 500 occurs after enabling a product, contact flink support.